Thursday, August 26, 2010

Musings on Zoom

It is nigh on impossible to buy a camera that does not have a zoom lens. Inexpensive cameras that do not sport the expensive optics still have, and advertise, “digital zoom”. Why is zoom so popular? My feeling is that it has to do with human vision. We see the world with a very wide field of view, nearly 180 degrees wide, yet the primary area of interest can be very small. Indeed when watching television the TV screen takes up typically less that one percent, less than one hundredth, of our field of vision.

Photos do not really reproduce the scene as we saw it and might remember it. We cannot visually zoom into the picture the way we could the actual scene. ButterflyWe have learned that maybe it takes several pictures, a wider view and a closer look. Even then we can be let astray. Here is a pleasant picture.
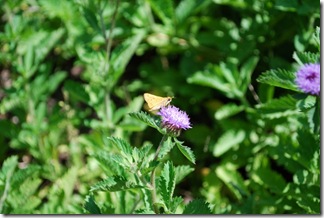
I saw a butterfly and took the picture. Right away I realized the picture I got was not what attracted my attention. This is really what I thought I saw:

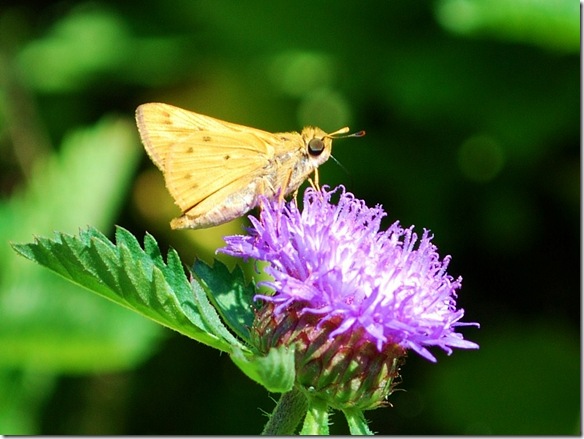
Butterfly

Now this is just a crop of the first picture. Had I performed the operation in the camera it would be called “digital zoom”. It works here because of the limited resolution of pictures on computer monitors. There are cameras sold with 8 megapixel sensors and “8x digital zoom”. Pity the poor buyer who falls for that – pictures with the resolution of a large postage stamp at maximum zoom. But I digress.

So the zoom lens gives us the ability to capture the detail that we so easily discern in real life. But it takes several pictures.

There is a technology that lets us see pictures with a wide view and yet discern small detail. Not quite as easy as just glancing at a spot – you need to use the mouse, but still quite amazing. I am talking about Microsoft Zoom.It.

Here is a picture with a wide field of view – almost as wide as the human eye sees – over 100 degrees horizontally – and you can zoom in to see detail anywhere in the scene. This picture has over 25 megapixels.

For best viewing, maximize your browser and click on the image to see the image full screen. Use you mouse wheel to zoom and drag picture as desired.


Monday, August 23, 2010

Dud to Showpiece–Artistic Effects as the Hero

We all have some photos that should have been discarded in the camera but somehow seem to have some merit – maybe form, or color, or patterns – that appeal in spite of major flaws. Let me show you what I am talking about.

LJK_1124 (2) (320x214)

image

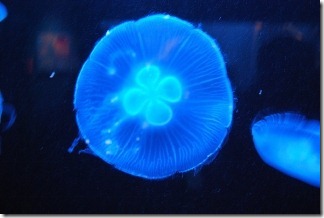
Here is a pleasant photo of a jelly fish. Unfortunately, the jelly moved and I moved the camera. The small close-up shows the flaws. This just is not “gallery” quality. I liked the photo, however. Maybe it could be used as a graphic in a brochure or greeting card …

Word 2010 to the rescue! image

Word 2010 has a variety of artistic effects that can hide the flaws and still result in a pleasing illustration. “Artistic Effects” shows tiny thumbnails of the actual picture with the effects applied. When the pointer is moved to the effect it is applied to the actual picture so it can be previewed. For this photo “Mosaic Bubbles” seemed like the most appropriate effect. I selected “Artistic Effects Options” and adjusted the Mosaic Bubbles setting to a “Pressure” of 100. This reduced the space between bubbles and made for a cleaner look. So here is the final result, but there is more to getting there.

Click the picture for a large view.

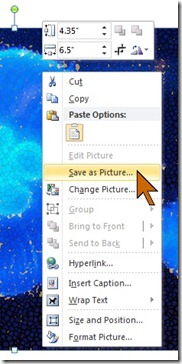
Word 2010, as well as the other application in Office 2010, has some peculiar and unexpected ways of handling pictures and artistic effects. It allows only one effect – if you choose another, it restores the original picture that was inserted and applies the effect to it. Also, it changes the size of the image when saving theW2010-sa1 file. So do your work in one session and don’t save. How do you get the picture with the effect applied? Right-click on the picture and select “Save as Picture”. You can specify the file type – for most uses you will want JPG as the format. All metadata will have been stripped from the picture.

If it seems desirable to apply more than one effect, then the procedure is this:

  • Insert the picture
  • Apply the first effect
  • Save the modified picture – right-click – Save as…
  • Insert the modified picture back into Word
  • Apply the next effect.
  • Repeat as desired.

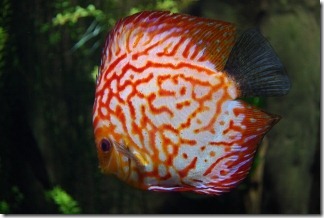
Let me demonstrate this with another photo. This picture has a rather dark LJK_1091-320background, the fish does not stand out very well – the edges, the tail – disappear into the background. So first I lightened the photo a bit in Windows Live Photo Gallery. Then inserted it into a blank Word 2010 document.

Background Remover

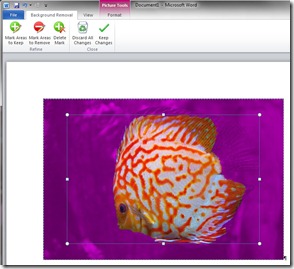
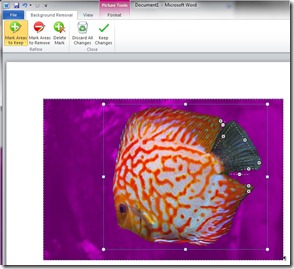
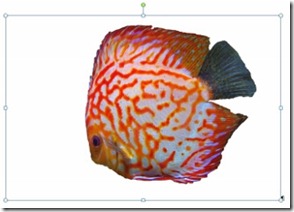
Word has a marvelous background remover tool. Here is the first default view using the tool. I set the cropping so all of the fish is included. Then I used the “Mark Area to Keep” and the “Mark Area to Remove” tools to draw lines into the tail to keep and small areas between tail and fins to remove. This is really quick, fewer then ten short strokes, you can see the “+” and “-” marks in the second illustration. Clicking “Keep Changes” removes the background.

Fish-W01

Fish-W02

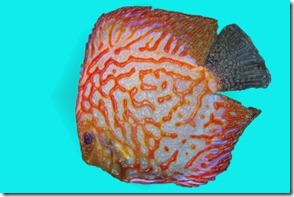
I saved the picture as described already. In Paint I set a large area and colored it teal and then did a “Paste from” and inserted the fish picture. Back to Word for more artistic effects. First I applied “Plastic Wrap” to give the picture a ceramic tile look. Another save and re-insert to Word. This time for an overall texture effect.

Effects in Word 2010 scale differently with different picture sizes. I could not get a course enough texture for the original size. After resizing the picture the texture (at maximum setting) was to my liking. Here a couple of progress illustrations and the final result.

Fish-W03 (320x229)

fish-W-05 (320x213)

Click on the larger image for a full size view. I am happy with this fish. It is much more impressive than the original photo, don’t you think?

Maybe even good enough to hang in the café!

Thursday, August 19, 2010

Visit our Gallery

For a most relaxing and enjoyable break get a fresh cup of coffee and visit the Gallery page. Each of the images on the page leads to a gallery by that artist. The galleries are very likely to be different each time you visit as the artists change and add to the galleries. Visit often!
Enjoy!

Saturday, August 14, 2010

Art Effects from Photos - using Excel 2010

A photo outing usually results in a large number of images with just a few that are worth sharing. My trip to the Georgia Aquarium was no exception. But there is one picture in particular that I seem to enjoy looking at again and again. The pose, patterns, colors, shapes, just seem to work for me. It appears to just cry out for presentation in different transformations.

So here, with apologies and all due respect to the ichthyologists out there ---

“My Variations on a Theme by Volitans Lionfish”


Most picture organizing programs, like Windows Live Photo Gallery or Picasa, provide tools for editing and improving photos. For more extensive manipulations full-featured image editors, like Adobe PhotoShop or Corel PaintShop Photo, offer a huge palette of tools. A surprising and unexpected source of artistic effect tools is Microsoft Office 2010.

Excel is not just for numbers anymore!

Not until after you insert a picture into a cell and click on it does Excel 2010 provide a “Picture Tools” tab (this is also true of Word 2010 and PowerPoint 2010). One of the commands in the Adjust section on the Ribbon is “Artistic Effects”.

It is an absolut pleasure to use. The menu shows little miniatures of the selected image with the various effects applied. Hover the mouse pointer on one of the miniatures and instantly the effect is applied to the picture so you can preview it. There are also options to adjust the effects such as brush size.

Other options allow you to soften or sharpen the image or to change brightness and contrast – with the Corrections tool – or to change the coloring with the Color command.

The Color menu allows control of color saturation and “color tone” – color temperature. It also has a palette of intriguing “recolor” options. These recolor options include some interesting black-and-white choices as well as effects for changing the overall picture coloring. You can see the miniatures here for my favorite fish. This tool also provides a control to select  additional theme colors.

I never imagined having this much fun using Excel. This is more like playing a game – far, far, from number crunching and spreadsheets.

Why, I think I will have another cup of coffee and play on…. 

Be sure to visit the Gallery page!

facebook welcome 1


Monday, August 9, 2010

Enhancing aquarium photos

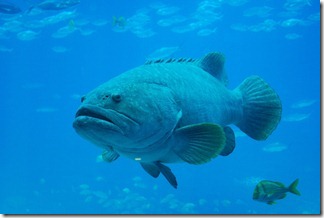
Pictures taken in aquariums can turn out less than stunning. Especially for creatures in large tanks, the photos may lack the crispness that brings anGrouper - Georgia Aquarium image to life. Let me show you what I am talking about.

Here is an otherwise nice photo of a grouper. It looks hazy and, well, bland, because of the turbidity of the water.

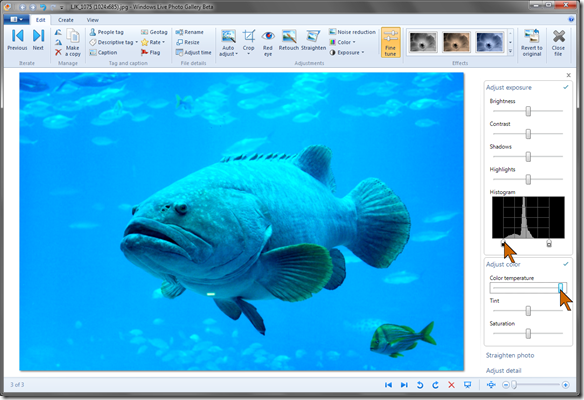
The photo has nothing that is black, and nothing that is white. The range of brightness values can be best illustrated by looking at a histogram of the photo. A histogram plots the distribution of tones from black to white along the horizontal axis, with the number of occurrences for each value on the vertical axis. Most image editingimage programs provide such plots, many cameras even do so. Here is the histogram for this image as shown in Windows Live Photo Gallery. I like that tool because it is simple to use and provides a number of very useful tools for enhancing pictures.

As you can see there are no pixels near the black (left) end of the scale and none on the right end. Photos with pixels covering the entire range from black to white are visually more satisfying, they “sparkle”.

One of the first, and easiest things we can do is to stretch out the pixel tone values. Live Photo Gallery makes that quite easy. Note the little markers on each end of the histogram. These are actually slider controls that can be used to set the black (left) and white ends of the spread of values. Not only can this adjustment be made by just dragging with the mouse, the results of the operation are displayed instantly and continuously. Here is the view of the program with the range adjusted as it appears best to me.

WLPG-grouper

Notice that I dragged the black end slider (see red arrows) up so it is just at the left end of the pixel values. I did not bring the right, white, control all the way to the highest pixel. It just looked better to me this way. Also note that I set the Color temperature to the the warm end of the range. Live Photo Gallery provides, as do other similar programs, additional controls. These too operate “live” so you can see the results as you move the sliders. Now, doesn’t this improve the photo nicely?

There is one other disturbing little flaw. Note the white “running light” on the fish. This must be a reflection in the glass, so I want to get rid of it.

Image editors, especially the pricey, full-featured ones, offer great tools for imageretouching and modifying pictures. Live Photo Gallery (here in the 2011 beta edition) has a very easy to use retouch tool.

Click on Retouch, drag a rectangle around the flaw, and Photo Gallery analyses the area around the flaw, finds an area that would be a good match and copies it in.  It gets it right on the first try most of the time. If it is not right, repeating the operation causes it to find a better fitting patch. Really easy.

So what were the steps I took to enhance this picture?

  • I “stretched” the pixels using the histogram tool,
  • took the edge of the excessively “cold”, blue, cast with the Color temperature control,
  • and retouched a reflection flaw.

The editing tools in your picture management of image editing program allow you to enhance your photos so they look like you remember seeing the scene, even if in actuality it was not as impressive.

Click Aquarium Slide Show to see a collection of some of my, slightly enhanced, photos that I took at the Georgia Aquarium.

facebook welcome 1

Thursday, August 5, 2010

Photos at the Aquarium

Get a fresh cup, make yourself comfortable, we are going to the aquarium. Not just any, but the world’s largest, the Georgia Aquarium!

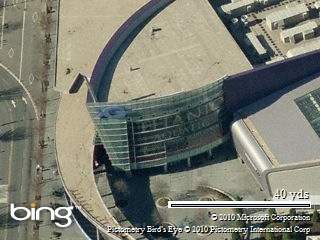
Map picture

You can find it on a map by clicking the picture at the right. For a more normal view see the photo below.

Both of these photos were taken in 2008 when the aquarium had a special exhibit about the Titanic. The sign is now gone, the place did not sink.Georgia Aquarium 

In fact it is an extremely busy place.

So recharge your camera battery, empty out the photos in the camera, you will want plenty of space.

Aquariums are fascinating and offer many exciting views. People take a lot of pictures. That part is easy. Getting a few good ones is a bit harder.

There are several little problems.

1) There is always a crowd. You have to be a bit patient to get close to the windows, or plan on including strangers in your photos.

2) All the little kids ahead of you have pressed their hands and noses on the glass. And yes, of course, they had p&b sandwiches at the Café Aquaria before going through the galleries. The staff is great in keeping the place ship-shape, but you still have to find a clean spot and get close to the windows to get good pictures.

3) The larger windows have seams. On the big tank the window is two feet thick. It is composed of several sections. Smaller tanks may also have windows glued together from smaller pieces. These seams are noticeable and will cause distortions. So position yourself carefully.

4) Most tanks are fairly dimly lit. More on that a little later, but in low light your camera will want to use flash. That is permitted in most galleries, however, keep in mind that glass reflects the light of the flash right back to the camera. My advice is to turn off the flash. But if you must use it, shoot through the glass at a good angle to avoid the reflection. Inspect your photos to make sure that they are ok.

5) Water, especially saltwater, is not completely clear. Creatures at some distance from the window will look like they are in a haze. So wait patiently for the fish to come closer to the window. Oh yes, they have SCUBA diving opportunities for visitors. You must be experienced and make advance reservations. But that is beyond this story.

6) The light inside the tanks is very blue. There is little you can do about that. Set your camera for daylight and plan on doing some post-processing of your photos.

So can we go in now?

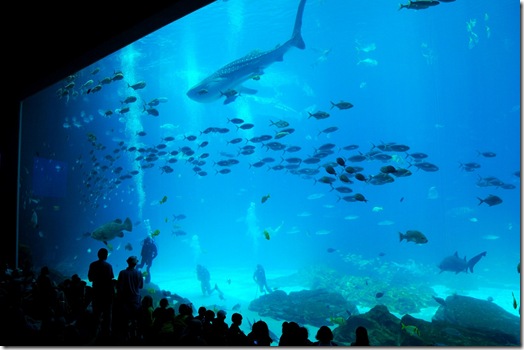
Alright, how about going right to the big tank.

Georgia Aquarium

The Ocean Voyager tank at the Georgia Aquarium is the world’s largest, and there is a window to match. The above photo required using a wide-angle lens. You can tell the size by the people in front and the SCUBA divers inside.

The visitors side is quite dim, but the light inside the tanks matches more what the fish need than what the picture-taking visitor would like to have.

At most tanks plan on using the highest practical ISO setting on your camera. That is the highest light sensitivity. For most cameras that is probably ISO 1600. Pictures will not have the sharpness the camera produces at ISO 100, but you need the speed in order to keep the shutter speed to 1/30 second or shorter. Some tanks have more light. The big tank photo above was shot at 1/30s, f/3.5 at ISO 200.

LJK_1099 - CF You will be amazed just how fast those creatures are in the water! Many of my shots at 1/30s show way too much motion blur. So a tripod or image-stabilization can’t help.

Post-processing is the modern “darkroom” part of making pictures. There are many thoughts on that that I would like to share, but that calls for another cup.

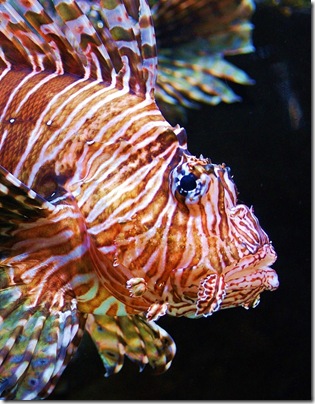
For now how about a “well-processed” lionfish.

We’ll leave it at that for now. Please do share your thoughts using the comment option below.

Enjoy your cup!

Hello World!

Hello World! - The typical first "output" from a new programming tool or a new programmer since the second half of my working career. Now this tells you a good deal about myself, my background, and my interests. There is one other passion besides "computering" and that is photography. I spent most of my working career at the intersection of those technologies. Digital photography brings these together.

Why "Café"? The term brings back happy memories. A café used to be a quiet place where you could enjoy a good cup of coffee, read the morning paper, watch the world go by through bright, large windows with discrete, translucent curtains, and get pleasure from some photographs or paintings from local artists. So this will be a relaxing, quiet place to share some of the things I learned and the things I enjoy.

Visit my café for information, tips, thoughts, and ramblings mostly on digital photography. Please share with me your knowledge and opinions, and we will have a good time.

Now the sign has been hung, the doors are open.
Welcome to Café Ludwig!